Tab Top Curtain Loop Quantity Calculator
Estimate tab loops per panel, finished spacing, tab cut dimensions, spare loops, and fabric strip yardage for sewn tab top curtains.
🏠Real Tab Top Presets
📏Loop Quantity Inputs
🧵Loop Benchmarks
📌Tab Construction Notes
Two Edge Tabs
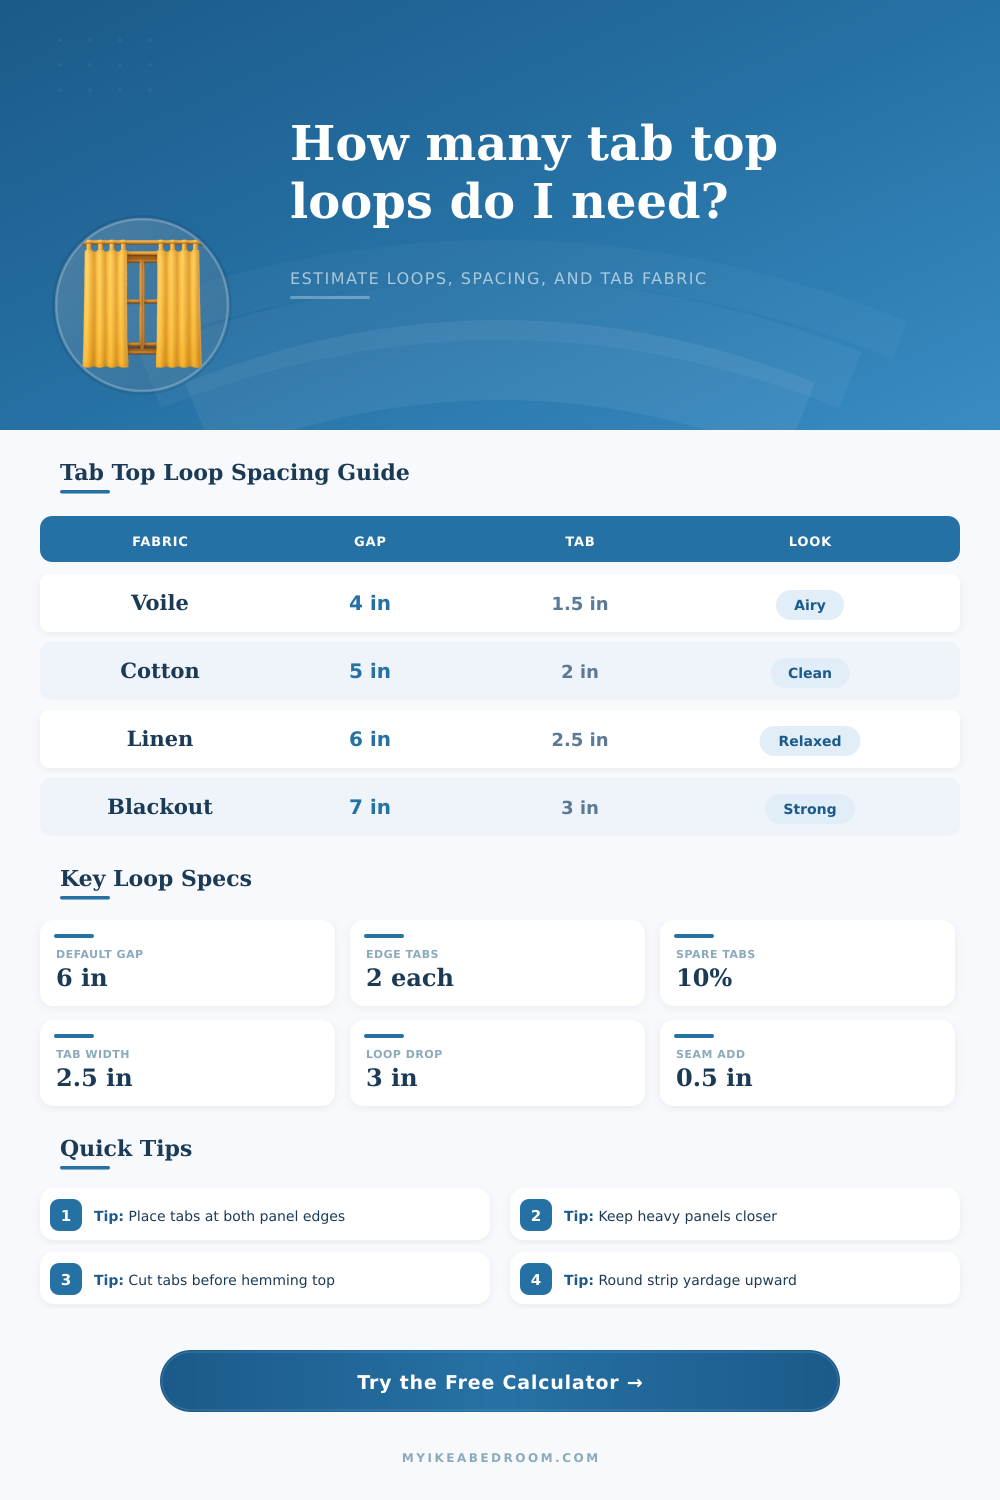
Each panel needs a tab near both side edges so the curtain does not droop away from the rod ends.
Finished Width
The calculator uses finished tab width, then adds seam allowance to get the cut width for each strip.
Loop Drop
Loop drop controls how far the curtain hangs below the rod and how much tab length must wrap over it.
Strip Yardage
Strip yardage is only for tabs. Main curtain panel fabric, hems, facings, and pattern repeat are separate.
📊Spacing Reference Table
| Fabric Type | Open Gap Range | Finished Tab Width | Best Use |
|---|---|---|---|
| Voile or sheer | 3.5 to 4.5 in | 1.5 to 2 in | Light curtains with small, frequent tabs |
| Cotton blend | 4.5 to 5.5 in | 2 to 2.5 in | Everyday bedroom and office panels |
| Linen-look panel | 5.5 to 6.5 in | 2.5 to 3 in | Relaxed folds across wider windows |
| Blackout lined curtain | 5 to 6 in | 2.5 to 3 in | More support points for lined fabric |
| Velvet or heavy drape | 5 to 6.5 in | 3 to 3.5 in | Strong tabs with reduced sagging |
📐Common Curtain Setups
| Setup | Panel Width | Gap Target | Typical Loops |
|---|---|---|---|
| Small cafe pair | 28 in each | 4 in | 7 to 8 per panel |
| Apartment voile pair | 42 in each | 4 in | 10 to 11 per panel |
| Bedroom cotton pair | 50 in each | 5 in | 9 to 11 per panel |
| Patio door panels | 54 in each | 5.5 in | 10 to 12 per panel |
| Room divider set | 57 in each | 6 in | 10 to 12 per panel |
✂Cut Size Reference
| Finished Tab | Seam Allowance | Typical Cut Width | Loop Drop Note |
|---|---|---|---|
| 1.5 in narrow tab | 0.375 in each side | 2.25 in | Good for sheers and cafe curtains |
| 2 in standard tab | 0.5 in each side | 3 in | Clean choice for cotton panels |
| 2.5 in medium tab | 0.5 in each side | 3.5 in | Balanced for linen-look curtains |
| 3 in wide tab | 0.5 in each side | 4 in | Useful for blackout and lined panels |
| 3.5 in heavy tab | 0.625 in each side | 4.75 in | Best for heavier drapery fabric |
📦Yardage Planning Table
| Total Loops | Cut Size Example | Total Cut Area | Strip Planning |
|---|---|---|---|
| 16 loops | 3 x 8 in | 384 sq in | Usually under 1/4 yd from 54 in fabric |
| 24 loops | 3.5 x 9 in | 756 sq in | Often near 1/2 yd after layout buffer |
| 32 loops | 3.5 x 9 in | 1008 sq in | Plan crosswise strips before cutting |
| 44 loops | 4 x 10 in | 1760 sq in | Continuous strip cutting is faster |
| 56 loops | 4 x 10 in | 2240 sq in | Check fabric width and seam direction |
⚖Fullness And Tab Count Guide
| Fullness Ratio | Visual Result | Loop Behavior | Use Case |
|---|---|---|---|
| 1.2x to 1.4x | Flatter casual curtain | Tabs spread across rod with shallow folds | Cafe curtains and closet covers |
| 1.5x to 1.8x | Balanced bedroom folds | Most tab top panels hang cleanly | Bedrooms, offices, and guest rooms |
| 2.0x to 2.2x | Fuller decorative folds | Tabs bunch more when curtains are open | Living rooms and wide windows |
| 2.3x plus | Dense fabric stack | Check stack-back space and rod load | Room dividers and heavy panels |
💡Practical Tab Notes
I’m going to admit something: there’s a particular kind of terror that arises at hour 2 of sewing curtain tabs only to discover that the final three loop will be too large for the rod to fit inside of. The dimensions of your fabric, the width of each tab, and your desired spacing don’t always add up to a nice round number without some math.
Use the curtain loop calculator to take all the hard work off your shoulders by answering questions about your panel size and space preferences (how much gap would you like between each?). Then it calculates just how many loops you’ll need and exactly where they should be placed. All you do is plug in your numbers and let it spit out a cut list with extra tabs and seam allowance included, sparing you from having to wing it.
How to Use the Curtain Loop Calculator
Most importantly, enter the finished width, which is the actual width of your panel once you have added the hemming. Don’t enter the width of the fabric bolt as-is; many do and then immediately run into trouble, since all that hemming will come off a large amount of material on either side. Enter the final dimension, and tool will know where to position the tabs in relation to the edge.
You’ll also specify the distance between tabs; i.e., how wide an opening there will be between loops of curtain fabric. That’s the part you see, the visible space. If you want a more relaxed, breezy drape, go for a wider opening, and vice versa. (A narrower gap results in a more structured, busy-looking drape with more folds.)
The rest depends on fabric weight. Heavier fabrics like lined blackout curtains has some real teeth. They pull hard on those tabs. Because of this, they need tighter loops spaced more widely apart so the fabric doesn’t slip right off the rod. Gravity’s not negotiable, so there is a range of recommended gaps listed in the tool’s included reference guide. Unless you account for fabric weight, over time your curtain will shift toward the center of the window until there are gaps on either side.
That’s where loop drop and tab width comes into play. The wider the tab, the better it can spread out weight; the longer the loop drop, the more firmly embedded the rod is in the curve, instead of teetering dangerously on the edge.
How you cut matters more then most DIYers realize. There’s a difference between cutting out separate rectangles for each tab to get precision. Instead, you can sew one long strip and then crosscut it, which is faster and typically saves slightly more fabric width too. The former uses more fabric because you can’t make straight lines along the grain lines, but it gives more precise cuts. The latter is quicker and will likely save you more fabric if your fabric is patterned, since you need to match it across the top of the piece.
The calculator takes this into account when calculating how much yardage to get, making sure you’re getting enough just for the tab pieces, not accidentally buying additional fabric for the main panel as well. This matters, since tab fabric is usually taken from accent/contrast bolts which may only have small amounts available.
Another good trick I use for my allowances is to have some extra. This thread snaps; sewing goes awry. Ten to fifteen percent more loops doesn’t cost much time-wise (or materials-wise), but it means I don’t have to panic frantically at the final minute because I cut one wrong. And yes, this happens. It’s just a buffer, a little something that will pay big rewards in terms of stress relief.
There are also insets at edges, which means your initial tab won’t be up against the side hem. A tab sitting right on the edge makes the curtain look unfinished and can make the whole thing droop oddly next to the bracket. An inch or so of space between the seam and first loop creates a cleaner shape for the panel and provides better structure support.
In short: Good curtains don’t happen by accident; they’re weighted correctly. That’s true whether you’re draping a huge patio door or hanging some curtains in your little cafe window.
How do you know if you’ve got it right? Well, the tabs should be spaced so that they make nice folds, but there shouldn’t be so much space that the fabric doesn’t stay put. And there should be enough points of contact (the loops) to keep everything together. When you decide how many loops you want before grabbing the scissors, sewing becomes a doable chore instead of a mad dash. By positioning each tab carefully instead of just throwing them on, you’ll have a pair of curtains that actualy look professionally made. Starting with the numbers ensures no panicking at bedtime.