Picture Rail Installation Height Calculator
Calculate the finished rail height, top line, bottom line, fastener mark, ceiling reveal, casing alignment, hanger drop, and usable art clearance before you mark the wall.
Choose a room condition, then adjust ceiling height, trim alignment, rail profile, hook drop, and artwork size.
| Method | Best use | Typical result | What to verify |
|---|---|---|---|
| Reveal below ceiling | Simple rooms without strong casing alignment | 9 to 20 in below ceiling | Rail does not crowd crown, vents, or ceiling slope. |
| Ceiling proportion | Older rooms where the rail should feel architectural | 80% to 90% of ceiling height | Top line still clears door and window trim visually. |
| Casing alignment | Hallways, window walls, and rooms with strong trim datum | At or just above casing tops | Reveal remains consistent enough around the room. |
| Crown/frieze spacing | Rooms with crown molding or a picture frieze | Rail top below crown bottom by 1 to 4 in | Rail profile has room for hooks and fasteners. |
| Art clearance fit | Large frames, tall mirrors, or furniture below | Rail high enough for frame bottom clearance | Hook drop and frame height are measured honestly. |
| Ceiling height | Conservative top line | Classic top line | Tall reveal top line |
|---|---|---|---|
| 7 ft 6 in | 78 to 80 in | 80 to 82 in | 82 to 84 in |
| 8 ft | 82 to 84 in | 84 to 87 in | 87 to 90 in |
| 8 ft 6 in | 86 to 88 in | 88 to 91 in | 91 to 94 in |
| 9 ft | 90 to 93 in | 93 to 96 in | 96 to 100 in |
| 10 ft | 98 to 102 in | 102 to 106 in | 106 to 111 in |
| Profile type | Face height | Fastener line | Hook behavior |
|---|---|---|---|
| Slim apartment rail | 1.25 to 1.75 in | 0.4 to 0.7 in below top | Short hook drop, best with lighter frames. |
| Standard coved rail | 1.75 to 2.5 in | 0.6 to 1 in below top | Most picture rail hooks seat reliably. |
| Deep traditional rail | 2.5 to 3.5 in | 0.8 to 1.25 in below top | Often creates a slightly larger hook drop. |
| Flat adapted trim | 1.5 to 3 in | Based on stud or blocking line | Confirm hook compatibility before installing. |
| Rail below frieze | 2 to 3 in | Set by reveal and frieze spacing | Looks best when the shadow gap is consistent. |
| Hanging condition | Typical drop from rail top | Frame bottom formula | Use case |
|---|---|---|---|
| Short picture hook | 2 to 4 in | Rail top - drop - frame height | Small frames and tight upper reveals. |
| Picture cord pair | 4 to 8 in | Rail top - drop - frame height | Classic hanging with cord or chain. |
| Long gallery wire | 8 to 14 in | Rail top - drop - frame height | Large frames lowered into the wall field. |
| High headboard wall | 3 to 7 in | Frame bottom above headboard plus gap | Bedrooms where art must clear bedding. |
| Hallway traffic zone | 3 to 6 in | Frame bottom above bump zone | Keeps lower edges away from shoulders and bags. |
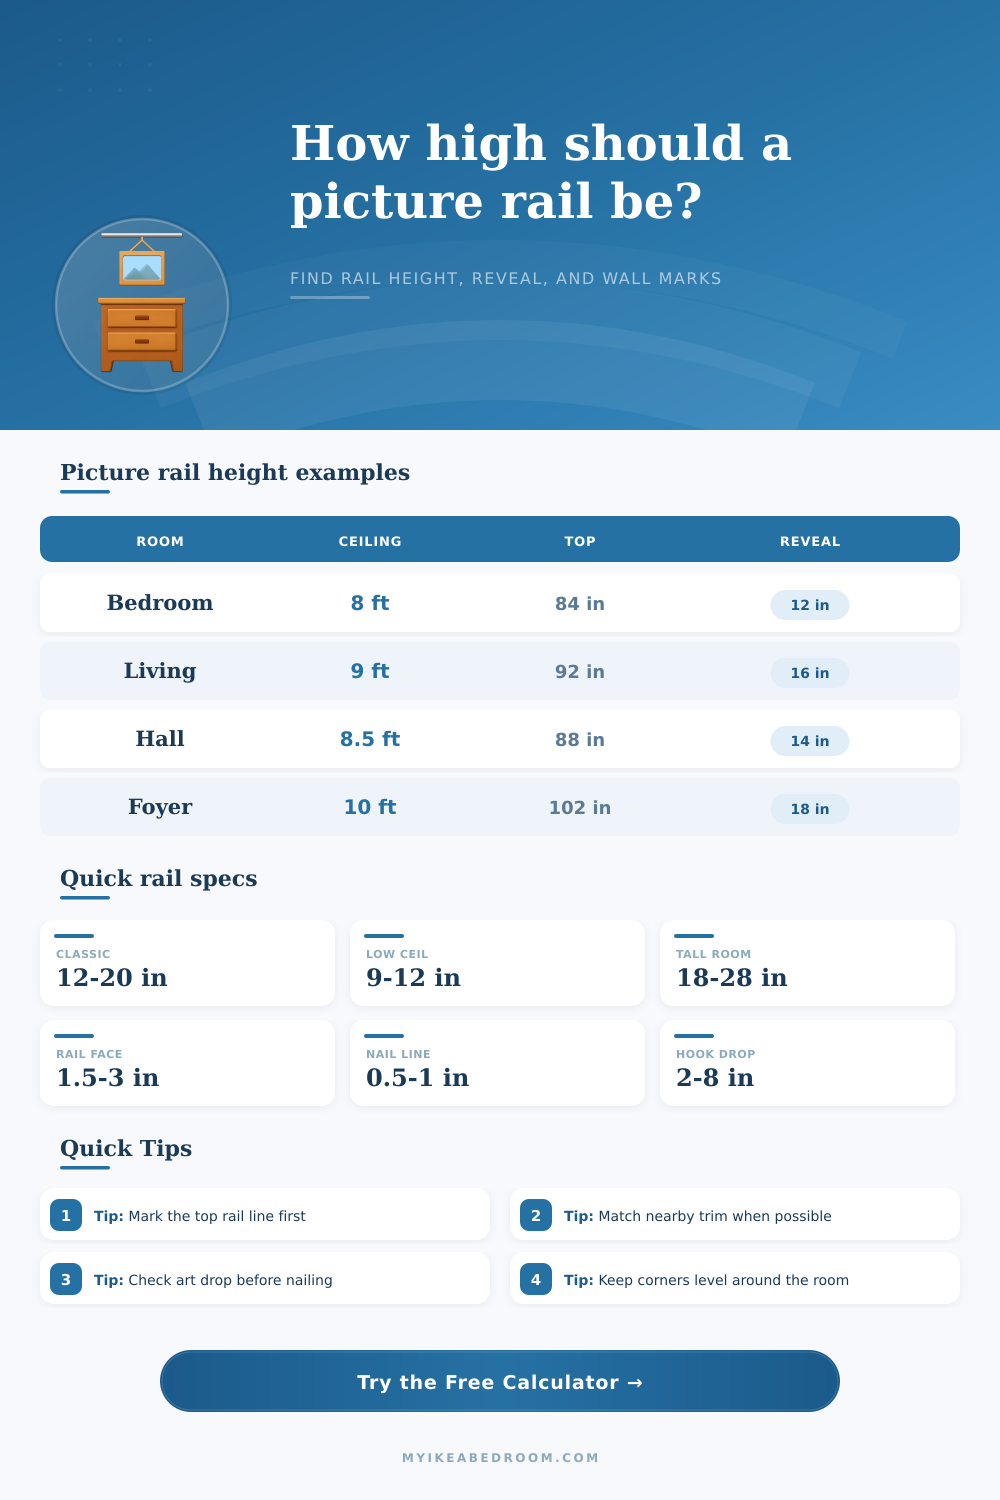
| Project | Ceiling | Rail top | Fastener mark |
|---|---|---|---|
| Classic bedroom | 96 in | 84 in | 83.25 in nail line |
| 9 ft living room | 108 in | 92 in | 91.2 in nail line |
| Gallery hallway | 102 in | 88 in | 87.25 in nail line |
| Low apartment room | 90 in | 79.5 in | 79 in nail line |
| Tall foyer wall | 120 in | 102 in | 101 in nail line |
Use it first: snap or mark this line around the room.
The top line controls the ceiling reveal and usually reads cleaner than measuring from the rail bottom.
Use for fit: confirms the full profile height.
Check the bottom edge against door trim, window trim, tall furniture, and the intended picture field.
Use for drilling: mark nails or screws from rail-top offset.
Profile shape, studs, backing, and the manufacturer's nailing flat can shift this line.
Use for frames: combines rail height, hook drop, and frame height.
The rail can look perfect but still hang art too low if the cord drop is longer than expected.
Mark a short sample first. Tape the calculated top line and bottom line on two walls before committing the whole room, especially when casing tops vary.
Measure the loaded hook drop. Hang one actual frame from the rail hook or cord and measure the settled drop before finalizing the rail height.
To determine the correct height for a picture rail, there is several measurements and visual considerations that you should make. You must consider the ceiling height of the room, the trim height in the room, and the height of the artworks that will be hung from the picture rail. If you place the picture rail at a proper height in the room, it will appear as if the entire room is finished with the artwork.
However, if the height of the picture rail are incorrect, the picture rail may appear like its too close to the ceiling or too low on the wall. One of the first measurements that you can take is to measure the height of the ceiling in the room. While the height of the ceiling will dictate where the picture rail can go, you can decide how high you would like the reveal (the empty space between the ceiling and the picture rail) to be.
How to Find the Right Height for a Picture Rail
If you would like the reveal to be shallow, you should place the picture rail higher on the wall. If you would like an deeper reveal, you can place the picture rail lower on the wall. Another of the measurements that you can take is to measure the height of the trim in the room.
If the ceiling has door casings and window heads, for instance, you can place the picture rail such that the top of the rail is even with one of these trim feature. Many picture rail calculator can perform the calculations for you to determine the height of the rail in this instance. Another of the considerations for placement is the profile of the picture rail.
If the profile of the picture rail is thin, for instance, you can use it in a room with low ceilings. However, because there will be less depth to the picture rail, there may not be much room for a hook to hang the artwork from the rail. An alternative to a thin picture rail is to use a traditional picture rail with a deeper profile.
The deeper picture rail will provide more space for the hook to properly sit into the rail. Additionally, the line that the fasteners for the picture rail will be marked along is often slightly below the top of the picture rail. Therefore, the picture rail will not necessarily sit on the measurement marked for the top of the rail.
The height of the artwork and the drop of the hook from the picture rail will help to determine the height of the picture rail. The drop of the hook is the distance from the picture rail to the top of the artwork to be hung. You can increase the drop by use a longer cord or wire for the hook.
The artwork should have clearance from other furnitures in the room, such as a headboard. If the artwork is too close to the other furniture, the placement of the artwork may appear unnaturaly. The calculator can combine the measurements for the drop of the hook and the height of the furniture to ensure that the artwork will not come in contact with the other furniture in the room.
In rooms that have crown molding, the picture rail cannot be placed within the molding. Additionally, the picture rail should not be placed so low in the room that there appear to be an accidental gap between the crown molding and the picture rail. You want to ensure that the shadow created between the molding and the picture rail is even throughout the entire room.
The same considerations apply to rooms that already have picture friezes or shadow bands in the ceiling. To determine the height of the picture rail, you can mark the height on the first wall in the room with tape. You can use the door or window casings to ensure that the height is even.
If the height is too high or too low on the first wall, you can adjust the placement of the picture rail along the perimeter of the entire room. Once you have determined the placement of the top line of the picture rail, the profile of the picture rail and the measurements of the hook that will be used to hang the artwork from the picture rail will set the placement of the bottom line of the picture rail and the placement of the fasteners for the picture rail. You should of checked the wall size first, because youll want to avoid any mistakes.
Dont forget that the wall size matter more then you think.