Room Picture Rail Quantity Calculator
Estimate continuous picture rail length, opening deductions, stock sticks, return pieces, waste allowance, scarf joints, nails, adhesive, and layout height for one room or a batch of matching rooms.
Choose a room scenario, then adjust perimeter, skipped openings, corner treatment, stock length, and waste to match the exact walls you plan to trim.
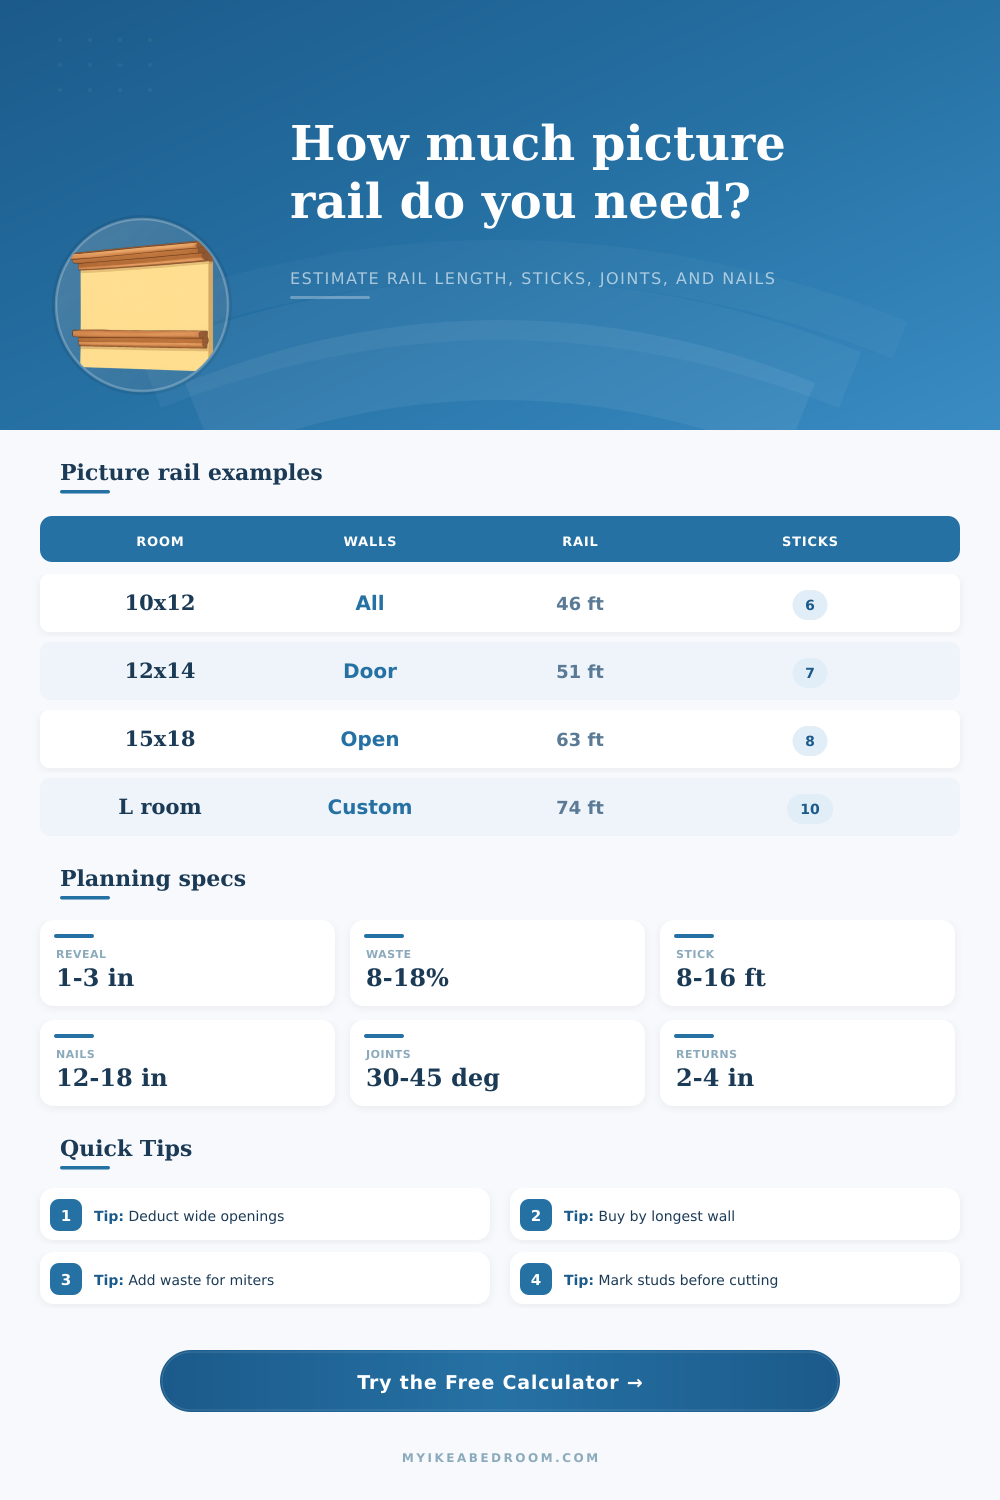
| Room size | Gross perimeter | Typical deductions | Buy with 10% buffer | 8 ft sticks |
|---|---|---|---|---|
| 10 x 10 ft bedroom | 40 ft | 3 ft doorway | 41 to 43 ft | 6 sticks |
| 10 x 12 ft bedroom | 44 ft | 3 ft doorway | 46 to 48 ft | 6 sticks |
| 12 x 14 ft bedroom | 52 ft | 3 ft doorway | 54 to 57 ft | 7 to 8 sticks |
| 14 x 16 ft dining room | 60 ft | 0 to 6 ft openings | 60 to 67 ft | 8 to 9 sticks |
| 15 x 18 ft living room | 66 ft | 6 to 10 ft openings | 63 to 70 ft | 8 to 9 sticks |
| Stock length | Best use | Joint impact | Transport note | Metric length |
|---|---|---|---|---|
| 8 ft | Small rooms, short walls | More scarf joints | Fits many vehicles | 2.44 m |
| 10 ft | Bedrooms and offices | Moderate joints | Needs clear path | 3.05 m |
| 12 ft | Common full-room rails | Fewer joints | Check elevators | 3.66 m |
| 14 ft | Long walls, fewer seams | Low joint count | Awkward indoors | 4.27 m |
| 16 ft | Large rooms and long walls | Lowest joint count | Plan handling | 4.88 m |
| Detail | Allowance per cut | Waste buffer | Why it changes | Good for |
|---|---|---|---|---|
| Square butt cuts | 1/4 to 1/2 in | 6% to 10% | Simple fitting | Painted rail |
| Mitered corners | 1/2 to 1 in | 10% to 14% | Angle tuning | Traditional rooms |
| Scarf joints | 3/4 to 1 in | 10% to 18% | Overlap trimming | Long walls |
| Corner blocks | 1/4 to 1/2 in | 8% to 12% | Blocks hide ends | Nursery, office |
| Stain-grade rail | 1 to 2 in | 15% to 25% | Grain sorting | Natural wood |
Full perimeter rail usually looks best when it wraps corners and only stops at large doorways or built-ins.
Deduct only gaps where rail truly stops. Small window casing often sits below picture rail height and may not matter.
Check stock length against the longest clear run so you know where scarf joints will land before cutting.
Studs plus adhesive help light rails stay straight, especially on plaster or walls that are not perfectly flat.
Measure at rail height. Baseboards, floor plans, and ceiling measurements can differ from the wall length where the picture rail will actually sit.
Record every stop. Doorways, tall cabinets, cased openings, fireplaces, and curtain pockets can create both a deduction and two small return cuts.
Place scarf joints deliberately. Keep joints away from inside corners when possible, and land them where lighting makes the seam less visible.
Round purchase sticks up. The calculator plans quantity; real stock defects, bowed molding, miter direction, and grain matching can change the final cut list.
When planning to install picture rail, one of the main challenges in the planning stage is to determine the amount of picture rail that is required to complete the installation job. Many individuals will attempt to take the measurements of the room that is to be treated with picture rail only once. However, taking the measurements of a room only once can lead to errors in the measurement process.
If an individual purchase too little picture rail, they will be short of the amount of material that is required to complete the installation job. Alternatively, if an individual purchases to much picture rail, they will have leftover pieces of picture rail that wont match with the other picture rail in the house. In order to install the picture rail in the room that is to be treated, it is first necessary to account for the openings in the room.
How Much Picture Rail You Need
Openings in the room include door, fireplaces, and tall cabinets. In these areas, the picture rail will end. Thus, there will be two end of picture rail in each of these openings.
Each of these ends may require the placement of a short return of the picture rail. These short returns will utilize the stock length of the picture rail. Additionally, corners in the room will affect the amount of picture rail that is required for the installation job.
Corners can be mitered and have the inside edge of the picture rail cut to allow the two edge of the picture rail to meet. The amount of picture rail that is required will be less in these instances because some of the picture rail will be removed to allow for the picture rail to be mitered. Alternatively, corner blocks can be used instead of mitered corners which will allow for the ends of the picture rail to be hidden.
These alternatives will affect the amount of picture rail that is required for the room because of the removal of these returns. The length of the stock picture rail can also impact the amount of picture rail that is purchased. Long sticks of picture rail can be beneficial in that fewer joints will form along long walls of a room.
However, the long sticks of picture rail may be more difficultly to transport to the job site. Shorter sticks of picture rail are easier to transport to the job, but more scarf joints will be required in the shorter sticks of picture rail. Scarf joints require overlaps in the picture rail which is waste in the project.
An individual can utilize a calculator to calculate the amount of picture rail that will be required by entering factors such as the shape of the room, the number of openings, the type of corner treatment, and the length of the stock picture rail. In addition to the factors noted above, it is also necessary to make allowance for waste in the cutting of the picture rail. Waste allowances account for errors that may occur when cutting the picture rail such as mistakes in the cutting process.
Waste allowances also account for picture rail that may have knots in the wood. Additionally, allowances for waste provide extra length for the case that the wall may be longer than the initial measurement of the length of the wall. The percentage of waste that is allowed can be based off the difficulty of the cuts of the picture rail.
For instance, if the picture rail is paint-grade pine, the cuts may be easier than with clear oak which has larger knots. The different ways of attaching the picture rail will impact the look of the picture rail installation but will not impact the amount of picture rail that must be purchased. For instance, closer fastener spacing may be used to ensure the picture rail adheres to any wavy plaster walls in the house.
Additionally, adhesive may be used in addition to the fasteners to ensure the picture rail remain straight during installation. Each of these methods will impact the time required to install the picture rail but will not impact the amount that must be purchased for the installation job. Tables that list the sizes of common rooms and the amount of picture rail that are required for those common sized rooms can be created.
These tables are not replacements for measuring the size of the rooms that are to be treated with picture rail. However, the tables can help to indicate whether the size of the room that is to be treated is common or unusual. Rooms with many wide openings may require longer stock length of picture rail than rooms with few openings.
Additionally, the longest wall in the room may need to be measured against the length of the stock lengths of picture rail. If the length of the wall is longer than the length of the picture rail stock lengths, scarf joint will need to be made at the longest walls. Thus, the location of the scarf joints should of been decided prior to cutting the lengths of picture rail.
When measuring the rooms that are to be treated with picture rail it is important to measure at the height at which the picture rail is to be installed. For example, if the measurements are taken at the baseboards they may not correspond to the measurements that is required for the installation of the picture rail. Additionally, any wall that is to be treated with picture rail may not be parallel to any other wall in the house.
Thus, errors may be made if measurements are taken at the ceiling or the baseboards. Additionally, the locations of the studs in the walls should be marked prior to installation to ensure that the fasteners will hit solid backing in the studs. The overall goal in purchasing the amount of picture rail necessary for a given job is to ensure that there is enough picture rail to complete the installation job.
However, it is also necessary to ensure that there is not so much picture rail that there will be expensive extra piece left over after the installation job is completed. Thus, the calculator will help to ensure that the individual purchases the correct amount of picture rail to complete the project.