Quilt Block Size Calculator
Plan finished block size, cut size, grid count, sashing, borders, backing, batting, and fabric yardage from one quilt layout.
Choose a real quilt format, then adjust the block size, sashing, borders, seam allowance, fabric width, and backup fabric buffer.
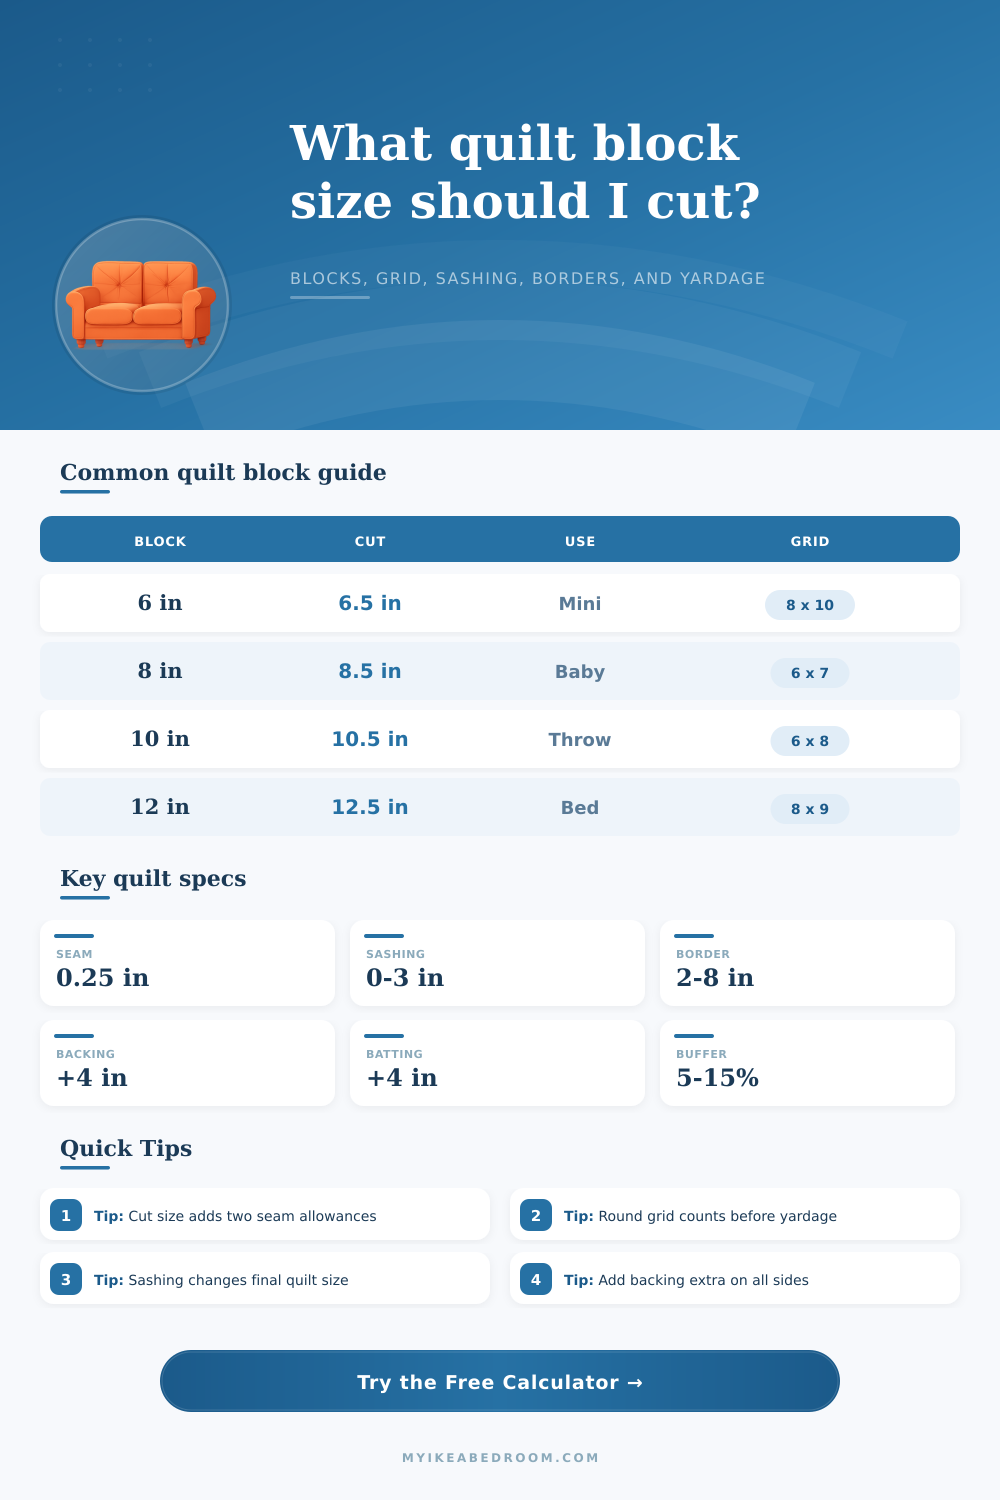
| Finished block | Cut with 1/4 in seam | Cut with 3/8 in seam | Typical quilt use |
|---|---|---|---|
| 4 x 4 in | 4.5 x 4.5 in | 4.75 x 4.75 in | Mini blocks, borders, sampler details |
| 5 x 5 in | 5.5 x 5.5 in | 5.75 x 5.75 in | Charm square layouts after seam allowance |
| 6 x 6 in | 6.5 x 6.5 in | 6.75 x 6.75 in | Wall quilts, baby quilts, dense grids |
| 8 x 8 in | 8.5 x 8.5 in | 8.75 x 8.75 in | Baby quilts, lap quilts, nine-patch blocks |
| 10 x 10 in | 10.5 x 10.5 in | 10.75 x 10.75 in | Throw quilts and twin quilts |
| 12 x 12 in | 12.5 x 12.5 in | 12.75 x 12.75 in | Queen quilts, fast bed quilt layouts |
| Quilt project | Target size | Useful block | Typical grid |
|---|---|---|---|
| Mini wall quilt | 24 x 30 in | 6 in block | 4 x 5 blocks plus border |
| Baby quilt | 40 x 48 in | 8 in block | 5 x 6 blocks, no border |
| Lap quilt | 50 x 60 in | 10 in block | 5 x 6 blocks or 6 x 7 with sashing |
| Throw quilt | 60 x 72 in | 10 in block | 6 x 7 blocks plus border |
| Twin quilt | 70 x 90 in | 10 in block | 7 x 9 blocks plus border |
| Queen quilt | 90 x 96 in | 12 in block | 7 x 8 blocks plus border |
| Finished strip | Cut at 1/4 in seam | Where it appears | Layout effect |
|---|---|---|---|
| 1 in sashing | 1.5 in cut strip | Between small blocks | Adds light spacing without changing scale much |
| 2 in sashing | 2.5 in cut strip | Sampler quilts | Visibly separates different blocks |
| 3 in sashing | 3.5 in cut strip | Large motif quilts | Raises final top size quickly |
| 4 in border | 4.5 in cut strip | Outer quilt edge | Adds 8 in to width and length |
| Finished top | Extra per side | Backing size | Batting size |
|---|---|---|---|
| 40 x 48 in | 4 in | 48 x 56 in | 48 x 56 in |
| 60 x 72 in | 4 in | 68 x 80 in | 68 x 80 in |
| 70 x 90 in | 4 in | 78 x 98 in | 78 x 98 in |
| 90 x 96 in | 4 in | 98 x 104 in | 98 x 104 in |
4-6 in finished
Best when the design needs many repeats, fine color placement, or detailed piecing.
8-10 in finished
Balanced for baby quilts, lap quilts, and throw quilts with readable motifs.
12-14 in finished
Useful for bed quilts, large prints, quick construction, and fewer seams.
1-3 in finished
Adds visual breathing room and lets a smaller block reach a larger quilt size.
Cut size check: Add seam allowance to both opposite edges. A 10 in finished square with 0.25 in seams cuts at 10.5 x 10.5 in.
Grid check: Sashing is counted between blocks only. Six blocks across have five vertical sashing gaps, then the outside border is added separately.
The first decision to make when creating a quilt is the size of the blocks that will make up the quilt. The size of the blocks is a critical decision because it will determine how many blocks can fit across the width and the length of the quilt. Furthermore, the size of the blocks will impact how much sashing are used and if the quilt will reach the dimensions that are desired.
Many people feel that the size of the blocks is a matter of math. However, there are tradeoffs involved in the selection of the block size, especialy those related to the amount of fabric that you must purchase and cut. The finished block size is the measurement of the blocks after the quilting process of sewing the blocks together and pressing them flat.
Choose Your Quilt Block Size First
When calculating the size of the blocks that will be used, the finished block size is the measurement that must be used as the starting point for calculating other aspects of the quilt. For example, if the desired size of each block is ten inches when viewed from the quilt’s finished top, then each block must be cut to that size. However, the size of the cut blocks must be larger than the measurement for the finished block size, as the width of each edge of a block that is sew together will be the seam allowances for that block.
The standard seam allowance for quilting is a quarter-inch. Since the quilter will sew each block along each of its four edges, the total amount of inch that must be added to both the width and the height of the finished blocks is one-half inch. Thus, if the size of each finished block is ten inches, the size of each square of fabric that is to be cut is ten and one-half inches.
This rule also applies to rectangles, as adding the seam allowance to the width of the block and adding the allowance to the height will result in a block that measures the desired size when it is completed and pressed. Sashing is the strip of fabric that sits between the blocks of the quilt. The finished sashing is the width of the sashing as it is seen when the quilt is completed.
However, the sashing that is cut must be wider than the finished sashing. This is because the sashing strips have seam allowances along each of their edges, just as the blocks do. For instance, if the finished sashing is two inches wide, the sashing strips must be cut to a width of two and one-half inches.
Calculating the width of the sashing is important because the width will impact the space between the blocks and the amount of fabric that will be required to purchase. Borders are the strips of fabric that are sewn to the quilt along each of its edges. The borders will impact the dimensions of the quilt, increasing both the width and the length of the quilt.
For instance, if a four-inch border is sewn to each of the long edges of the quilt, the length of the quilt will be eight inches longer than the length of the internal blocks of the quilt. Another example involves the width of the quilt; adding four-inch borders to each of the short edges will lead to the quilt being eight inches in width wider than its internal quilt block component. In most instances, quilts has borders of even dimensions along each edge.
Thus, a calculator is used when sewing the borders to ensure that the size of the border does not impact the number of blocks that are to be made for the quilt. There are two ways to calculate the grid of a quilt. Each method has its purpose and value for those creating quilts.
The first method involves selecting the dimensions of the finished quilt. The second method involves selecting the number of blocks that are to make up the quilt. Thus, the first method allows a quilter to determine the dimensions that they wish to achieve for their quilt top when it is complete.
The second method provides a quilter with the flexibility to use a specific number of blocks for their quilting project. The layers that lie behind the quilt top are referred to as the backing and batting. For these layers, a margin of fabric must be purchased.
Most quilters will purchase a strip of fabric that is four inches wide for each of the sides of both the batting and backing. This four-inch margin along each of the backing and batting layers allows the machine or longarm quilter necessary fabric to hold the layers of the quilt as it is stitched together. In addition to the width of the quilt top and the batting and backing, an additional piece of fabric must be purchased: the fabric that will be used to prepare the quilt top.
This fabric needs to be purchased in an amount that includes a buffer for potential errors. A ten-percent buffer is most common for this process. For example, when cutting the fabric for the quilt blocks, some of the fabric will be lost due to the squaring of the fabric or cutting of the blocks.
For instances when directional prints or fussy cutting are required, the percentage of the fabric that is cut can be much larger than a ten-percent buffer. This percentage is applied to the total amount of fabric that will be required for the quilt to account for the extra amount of fabric that may be required. Another factor that influences the amount of fabric that is required for a quilt is the complexity of the blocks that are to be used for the quilt.
A quilt that includes blocks that only require one fabric to be cut and sewn will require less fabric than a quilt that includes complex blocks that require many pieces of fabric. This complexity factor is another way to ensure that the amount of fabric that is purchased will be accurate for the project. As with most aspects of quilting, the finished block size is the most important measurement for a quilt.
Other measurements can be calculated in relation to the size of the finished block. Furthermore, by determining the size of the blocks early in the quilting process, any mistakes can be caught before any fabric is cut. As such, it is easier to make any necessary changes to the size of the blocks when the quilt is still in its planning stages than once the blocks have been cut.
You should of considered the blocks size first.