Cornice Angle Calculator
Find compound miter and bevel settings for crown, cove, cabinet-top, bay window, sloped ceiling, and outside-return cornice cuts using wall angle, spring angle, projection, drop, reveal, and test-cut allowance.
Choose the closest cut situation, then adjust the measured corner, spring angle, projection, drop, ceiling slope, reveal, and saw orientation.
| Spring angle from wall | Flat miter setting | Flat bevel setting | Nested setting |
|---|---|---|---|
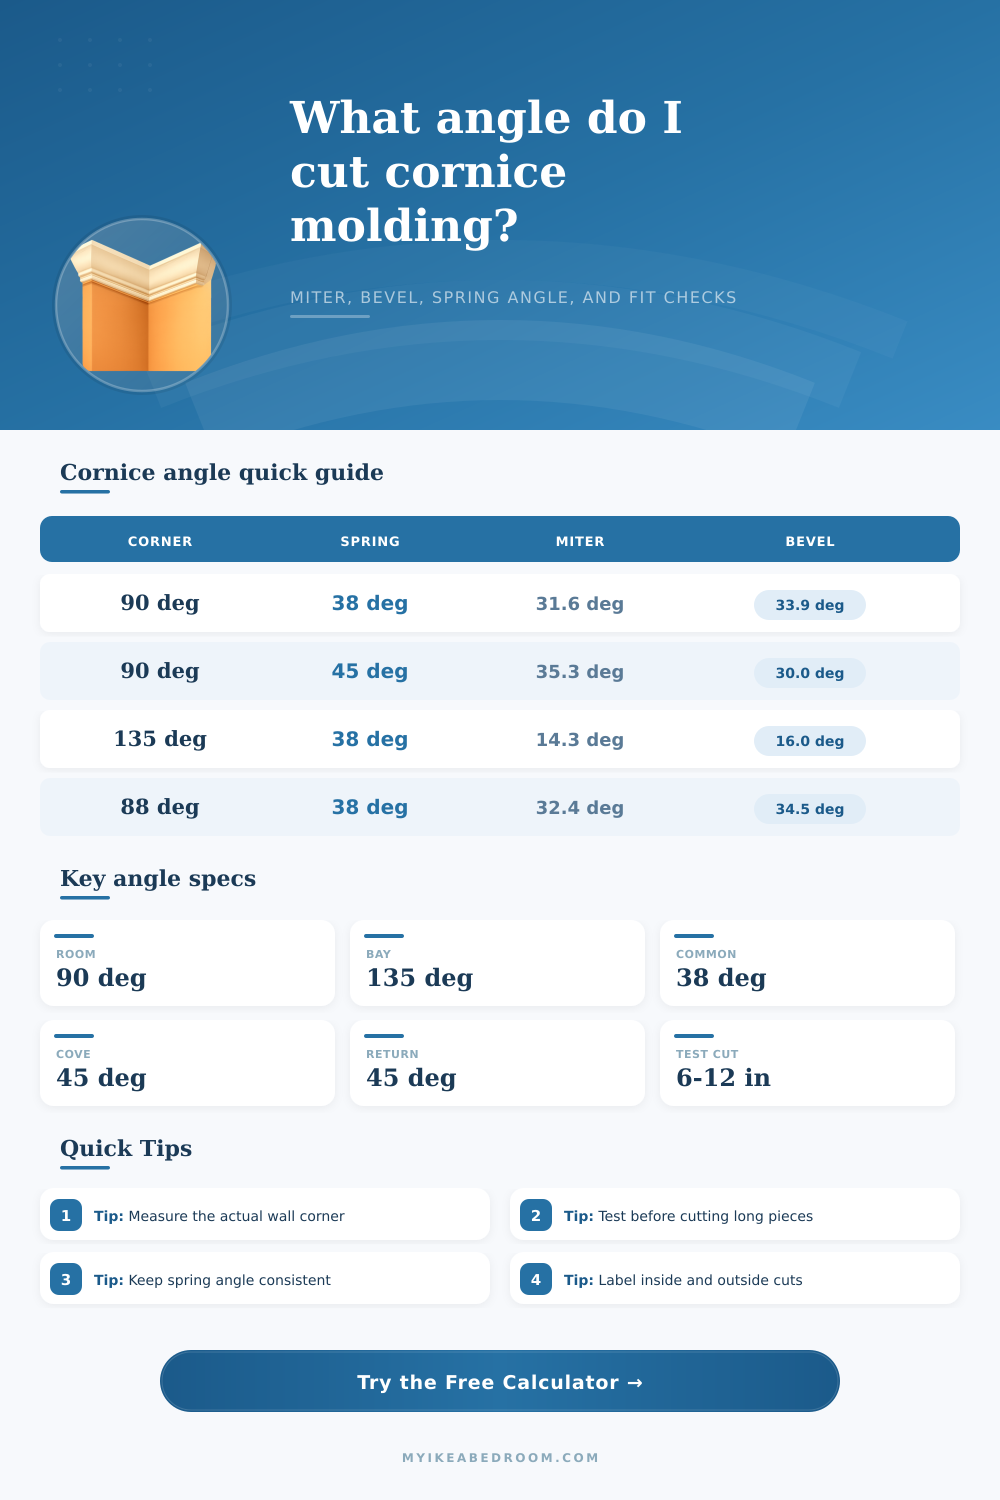
| 38 degrees | 31.6 degrees | 33.9 degrees | 45.0 degrees miter, 0 bevel |
| 45 degrees | 35.3 degrees | 30.0 degrees | 45.0 degrees miter, 0 bevel |
| 52 degrees | 38.4 degrees | 25.7 degrees | 45.0 degrees miter, 0 bevel |
| 60 degrees | 40.9 degrees | 20.7 degrees | 45.0 degrees miter, 0 bevel |
| Measured wall angle | Flat miter | Flat bevel | What changes |
|---|---|---|---|
| 86 degrees | 33.4 degrees | 34.9 degrees | Tighter than square; miter opens slightly. |
| 88 degrees | 32.5 degrees | 34.4 degrees | Small correction usually visible on painted crown. |
| 90 degrees | 31.6 degrees | 33.9 degrees | Baseline square room corner. |
| 92 degrees | 30.8 degrees | 33.3 degrees | Wider than square; miter closes slightly. |
| 94 degrees | 30.0 degrees | 32.8 degrees | Use test blocks before long finished pieces. |
| Corner situation | Wall angle | 38 degree flat compound | Nested miter-only |
|---|---|---|---|
| Outside return or square cabinet corner | 90 degrees | 31.6 miter / 33.9 bevel | 45.0 degrees |
| Shallow bay side turn | 120 degrees | 21.3 miter / 24.7 bevel | 30.0 degrees |
| Common angled bay face | 135 degrees | 14.3 miter / 16.0 bevel | 22.5 degrees |
| Very shallow bay or softened turn | 150 degrees | 9.1 miter / 11.8 bevel | 15.0 degrees |
| Fit signal | Spring-angle delta | What it means | Adjustment to check |
|---|---|---|---|
| Good fit | Within 1 degree | Projection and drop match the selected spring angle. | Keep the fence stop or wall line consistent. |
| Slight mismatch | 1 to 3 degrees | The molding may sit proud or leave a small ceiling line. | Use a small reveal or adjust the spring stop. |
| Visible mismatch | 3 to 6 degrees | Face angle and projection/drop are competing. | Make a test pair before cutting room-length stock. |
| Profile conflict | Over 6 degrees | The entered spring angle likely does not match the molding. | Re-measure drop, projection, or spring angle. |
Best for: wide cornice and repeatable saw settings.
Uses both miter and bevel angles, so spring angle must be entered accurately.
Best for: simple 90 degree rooms and shop-made stop blocks.
Uses zero bevel, but the molding must be held upside down at the installed spring angle.
Best for: exposed ends at cabinets, windows, and short cornice boxes.
Cut two small mirror-image pieces first so the return grain and profile line up.
Best for: vaulted rooms where the ceiling plane changes across the joint.
Use the slope delta as a test-cut nudge, then tune with the miter correction input.
Use two labeled test blocks. Mark left, right, wall side, ceiling side, inside, and outside before changing the saw. Cornice profiles are easy to flip after the first cut.
Match the installed spring angle. A perfect miter setting still opens if the molding is sprung differently on the wall than it was held at the saw.
A cornice angle calculator are a tool used to calculate the correct settings for your miter saw when installing crown molding. When installing crown molding, it is necessary to take into account the way that the molding will sit against the wall and the ceiling. The molding isnt necessarily going to be in contact with the plane of the ceiling and the wall, so you have to make calculations into the angle of the molding pieces so that they will properly fit together.
A cornice angle calculator will take the measurement of the room and the measurements of the molding to calculate the necessary miter and bevel angles for the saw. The miter and bevel settings on your saw will allow you to make these precise cut on the crown molding. Not all room are constructed with perfect angles and with perfectly straight walls.
How to Use a Cornice Angle Calculator
The angle of the room corners may be slightly more or less than 90 degree. To accurately calculate the angles, you must measure the angle of the wall with a digital angle finder or test blocks. Additionally, it is also necessary to know the spring angle of the crown molding being used.
The spring angle is the angle of the molding when it is install against the wall. Common angles for crown molding are 38 degrees and 45 degrees, though some molding can have a spring of 52 degrees. These two angles will be the variable necessary for a cornice angle calculator to provide the necessary miter and bevel angles for installing the molding.
Crown molding can be cut in two different way on the miter saw: flat cutting and nested cutting. Flat cutting involve laying the molding on the saw table and making cuts with both the miter and bevel saw settings. Nested cutting, however, involves placing the molding against the saw fence at the same angle that the molding will sit against the wall.
In this case, the miter saw only need to be adjusted to the molding angle because the molding is already in the correct spring angle. A cornice angle calculator will ask for the preferred cutting method so that the angles provided will be apropriate for that cutting method. The dimensions of the molding will also play a role in the calculation of the angles.
The projection and drop of the molding will determine the spring angle. The projection is the distance of the molding from the wall, and the drop is the distance of the molding from the ceiling. These measurements will need to match with the spring angle of the molding.
If the drop and projection measurements does not match the spring angle, the molding will not fit properly into the room. You can enter the drop, projection, and spring angle into the cornice angle calculator to ensure that they match. In some instance, the ceilings may also have a slope to them.
For instance, vaulted ceilings or tray ceilings have slopes to them. If the ceiling have a slope to it, the saw will need to adjust both the miter and bevel angles. The cornice angle calculator will also accept a slope angle input so that the settings will be adjusted to the ceiling to prevent the molding from twisting as it is installed along the ceiling slope.
It is also a good idea to make test cuts of the molding on the miter saw before cutting the molding for the actual project. Test cuts will allow you to ensure that the angles calculated by the cornice angle calculator are appropriate for cutting the molding. Using scrap wood for these test cuts will allow you to test the angles without waste the actual crown molding.
Should the test cuts not come out properly, it is necessary to measure the angle of the wall and the spring angle of the molding again. Additionally, you must also take care when making test cuts to ensure the molding is not flipped on the saw incorrectly. Incorrectly flipping the molding during test cuts will result in a mirror image of the molding on the saw table.
The cornice angle calculator is a tool that translates the physical measurement of a room into the mathematical settings required by a miter saw to cut crown molding. The measurements of the wall angle, the spring angle of the molding, and the preferred method of cutting the molding will be the variables that must be entered into the cornice angle calculator. Once you have entered these variables, the tool will calculate the necessary setting for the miter saw to make the cuts to the molding.
These calculations will result in crown molding pieces that will properly fit against the wall and the ceiling of the project room.