Applied wall molding and panel planning
Wall Trim Molding Calculator
Estimate decorative panel molding footage, horizontal rail runs, clear opening sizes, stock sticks, trim-face coverage, and cut counts for accent walls, wainscot bands, and picture-frame layouts.
Installing trim molding on the walls requires careful mathematician planning. Mathematical planning ensure that the trim molding for the walls will be proportional and balance. To determine the amount of trim molding needed, you must determine the numbers of linear feet of trim molding you need and the dimension of the individual panels of trim molding.
If you do not determine the dimensions of the trim molding panels correctly, then you will likely make mistake when cutting the trim molding panels. Proportion is another key factor in determining how the trim molding will look when installed on the wall. Proportion provides a sense of rhythm to the trim molding.
How to Plan and Measure Trim Molding for Walls
The reveals and the trim zone height need to be balance. Reveals are the spaces between the edge of the wall and the trim molding on the wall. The spaces between the individual trim molding panels are the panel gap.
If the reveals and the panel gaps is too small, then the trim molding looks too crowded on the wall. If they are too large, then the trim molding looks too loose on the wall. Many people will use the total width of the wall to determine the number of columns and row of trim molding needed.
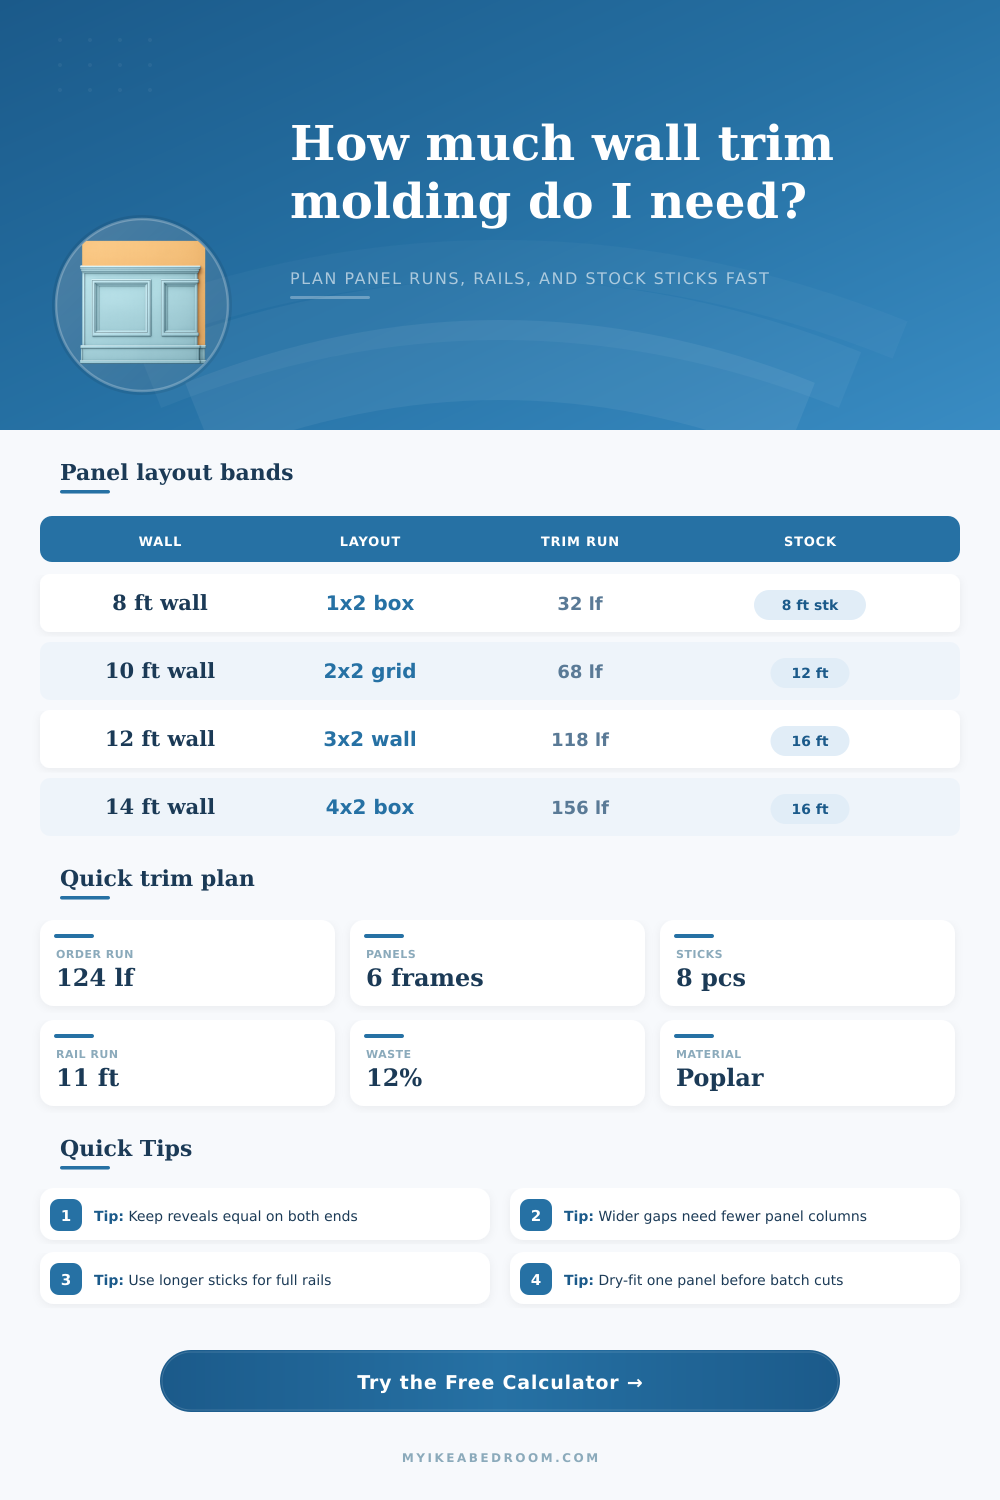
For example, if a person is working with a 14-foot wall, they might decide on three columns and two rows of trim molding panel. The trim zone is the area of the wall that the trim molding will cover. The trim zone does not always have to cover the entire height of the wall.
For example, in a wainscot trim molding installation, the trim zone will not go to the ceiling; instead, the trim zone may only go to the chair rail, which is roughly 54 percent of the total height of the wall. In other trim molding installations, the trim zone may go toward the ceiling. If the trim zone is to be full height on the wall, then longer sticks of trim molding is required for installation.
Additionally, if there are architectural opening in the wall, such as a doorway or a window, you must subtract the width of those openings from the total horizontal footage of trim molding needed. The length of the sticks of trim molding you use will affect the installation of the trim molding. Eight-foot sticks are good for small wall.
However, eight-foot sticks require more scarf joint when installing the trim molding on the wall. Sixteen-foot sticks allow the trim molding to be installed in longer rail along the wall. However, they may create more waste than eight-foot sticks.
The material of the trim molding also matter. For example, poplar is an excellent wood to use for trim molding that will be painted grade. For trim molding that will be installed in environment that are humid, use PVC trim molding because it will not react to the humidity in the environment.
The clear panel size is the size of the opening left by the trim molding once it is installed on the wall. If there is a 10-foot wall with two columns of trim molding, the clear panel size can be 48 inches wide. If there are three columns, then the clear panel size might be 30 inches wide.
The visible trim molding will tell you the coverage of the trim molding on the wall. The joint counts will tell you the number of seam in the trim molding once installed. Build a sample frame of the trim molding and use it to test the reveals and the panel gaps.
It will help you determine whether or not the trim molding will look good once installed on the wall. Common errors include unequal reveals and improper spacing of the gaps between the trim molding panels. If the reveals on the ends of the trim molding are not equal, trim molding will look unbalanced on the wall.
Use painters tape to test the trim molding layout on the wall. It is common for walls to bow inward or outward slightly; therefore, by testing on the wall with painters tape, you can adjust the trim molding to account for uneven wall. Additionally, allow for a waste margin of approximately 12 percent of the total trim molding needed when purchasing the trim molding.
This 12 percent waste margin will account for any mistake made when cutting the trim molding for the miter joint. Not all styles of trim molding use the same proportions. For example, classic picture frame trim molding have reveals of equal width.
Modern trim molding may have slim line for the reveals and trim molding profiles. Each style uses a specific ratio of reveal to trim molding to determine how well the trim molding will look on the wall. Follow a specific installation rhythm for the trim molding.
Start with the vertical trim molding pieces and install the trim molding from the center of the wall outward. Use caulk to cover the gap between the trim molding panels. If the trim molding is made of poplar, use a filler that is compatible with painted wood trim molding.
If the trim molding is PVC, use caulk that is compatible with PVC trim molding. Use a calculator to determine the footage of trim molding needed and the number of stick of trim molding of each length. This trim molding calculator can also tell you the dimensions of each trim molding panel needed for your project.