📐 Ceiling Tile Layout Calculator
Calculate tile counts, border widths, and grid layout for any room size
Ceiling Tile
Office Tile
Noise Rating
(2x2 mineral)
2x2 Tile
2x4 Tile
Mineral Fiber
Border Width
| Tile Size | Tile Area (sq ft) | Tiles per 100 sq ft | Tiles per 10 m² |
|---|---|---|---|
| 12x12 in (1x1 ft) | 1.00 sq ft | 100 tiles | 108 tiles |
| 24x24 in (2x2 ft) | 4.00 sq ft | 25 tiles | 27 tiles |
| 24x48 in (2x4 ft) | 8.00 sq ft | 13 tiles | 14 tiles |
| 600x600 mm | 3.88 sq ft | 26 tiles | 28 tiles |
| 600x1200 mm | 7.75 sq ft | 13 tiles | 14 tiles |
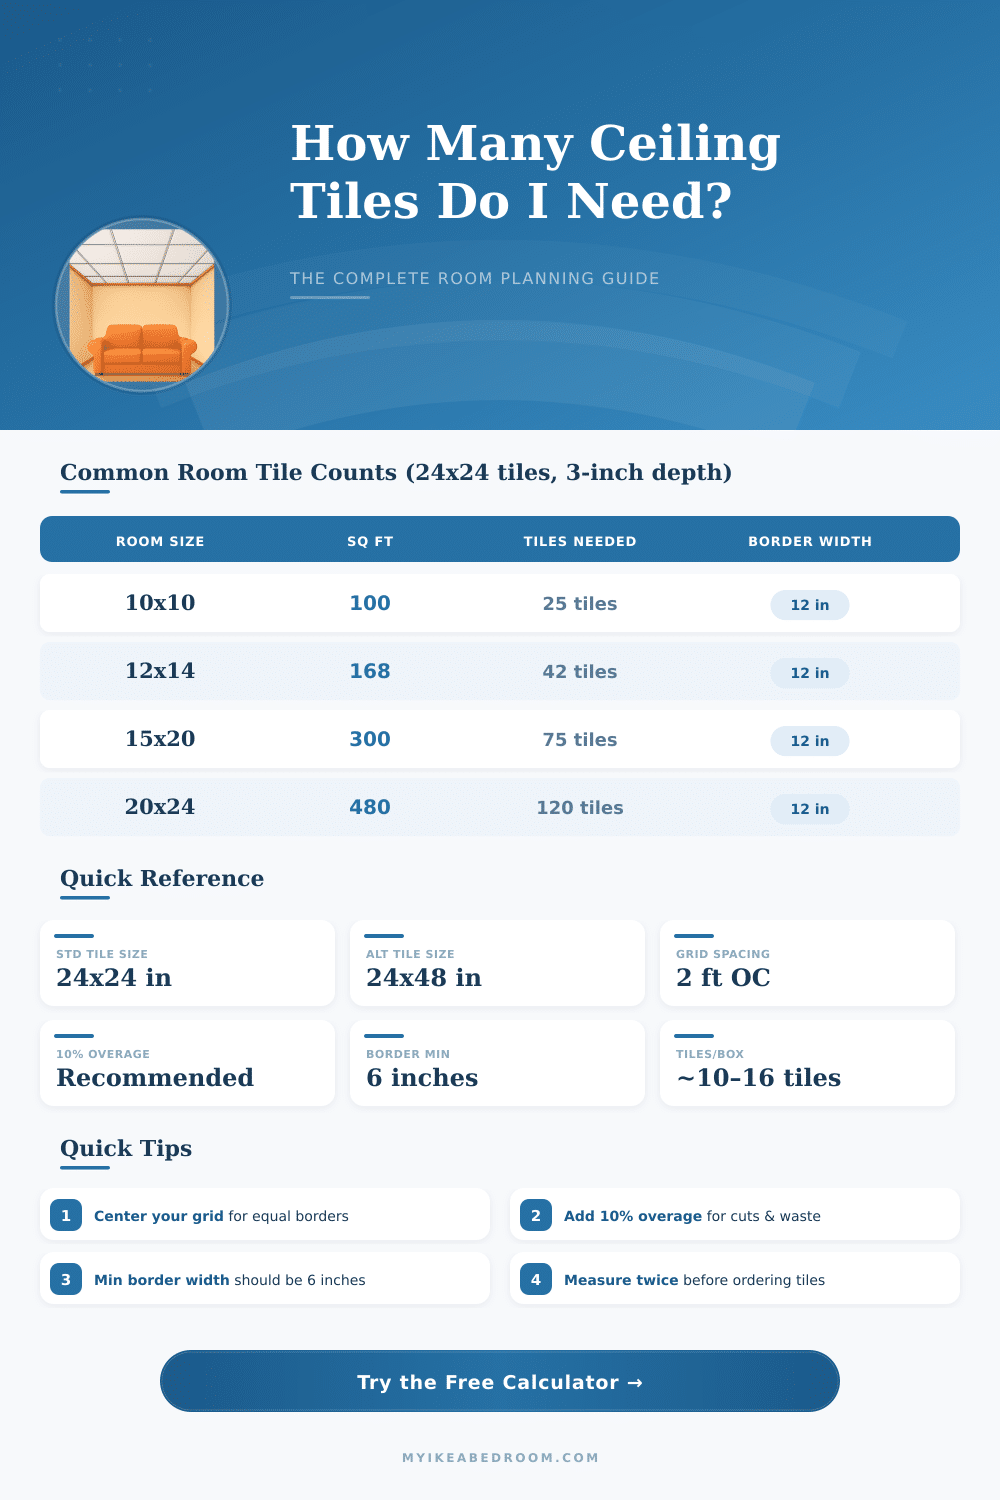
| Room / Area | Sq Ft | 2x2 Tiles Needed | 2x4 Tiles Needed |
|---|---|---|---|
| Small Bathroom 8x10 | 80 | 22 | 11 |
| Home Office 10x12 | 120 | 33 | 17 |
| Bedroom 12x14 | 168 | 46 | 23 |
| Living Room 15x20 | 300 | 83 | 42 |
| Large Office 20x24 | 480 | 132 | 66 |
| Basement 20x30 | 600 | 165 | 83 |
| Classroom 16x30 | 480 | 132 | 66 |
| Tile Type | Main Runner Spacing | Cross Tee Spacing | Grid Module |
|---|---|---|---|
| 24x24 in tiles | Every 4 ft | Every 2 ft | 2 ft module |
| 24x48 in tiles | Every 4 ft | Every 4 ft | 4 ft module |
| 12x12 in tiles | Every 2 ft | Every 1 ft | 1 ft module |
| 600x600 mm | Every 1.2 m | Every 0.6 m | 0.6 m module |
| 600x1200 mm | Every 1.2 m | Every 1.2 m | 1.2 m module |
For a professional look, measure the room and find the center point. Work outward from center so border tiles on opposite walls are equal width. A border less than half a tile wide looks awkward — shift your starting point by half a tile to avoid this.
Always order at least 10% extra tiles. Border tiles must be cut, and cuts can crack. Having spares on hand also helps with future repairs — tile styles are often discontinued, making exact matches impossible later. For diagonal or irregular layouts, add 15–20% overage.
Get a plan for Ceiling Tile Layout floors require a bit of basic math and enough patience, but when you succeed, it changes entirely the look of your ceiling. The main secret is in that the floors at the walls on opposite sides have equal slices, nothing looks more bad than one side with whole floor and the opposite with a little chip.
Simple start: take paper with grid and draw out floors in full size through the center of the room, with slices planned for the edges. Count the width of your corner floor share the length of the room by the width of floor. Take the remaining parts of that division, add one whole floor-width to it, later share that amount by two.
How to Plan a Ceiling Tile Layout
Here is your size for the corner floor at every end. So, if the room gives roughly 7.25 floors, spread that rest equally between both sides.
Center the lines. The main T-beam should cut the room in two halves, and then everything flows from that line. Your corner floors should not be less than six inches, if it is possible.
Good strategy is lay whole floor directly on the central line, with equal slices aruond the whole edge.
Ceiling Tile floors come in different sizes, usually one counts length, width and depth. The most commonly used are 12-inch square with thickness of about half inch. One finds also 2×2 and 2×4 variants around.
If you plan the walls from the start, stay at 2×2 or 4×4 grid to make the Layout of Ceiling Tile floors more even during the whole process. It requires clarity, but does deserve the effort.
Here is the spot: your Layout does not need to be strictly square. Broken ceilings well match with diagonal, curved fabric, brick-pattern, climbing, diagonal ore regular templates. Only that already can add style to something, what otherwise would seem simply forgettable ceiling.
Non-square rooms bring chaos in the Layout. If walls are not parallel and measures do not match one the other, find the central line and work from that spot (that stays your most reliable way). Planning balance from the center makes sure that the corner slices seem uniform.
Count the whole number of floors is fairly easy, multiply the two sizes of the ceiling for the total area, later share by the covered surface of one floor. Add to your order roughly ten percent for the waste, always wise idea.
Some floors are fragile and break easily without big cause. The secret is hold them flat, raise above the grid, turn the back part down, and later stick them easily in their place. You can also set them from two sides, allowing the next floor stick its tongue in the groove.
More old setups commonly only stuck floors directly to theceiling. Cross beams between the main beams can follow nested order or go even (honest), it depends mostly on what pleases you.